Hello World!
How to read these guides:
- Bolded words are instructions for you to complete. Do the tasks that bold text tells you to.
- Underlined words are keywords. Learn these keywords, as they are very helpful in learning programming.
- Italicized words are lines of code, names of buttons, or names of files.
1. Plug in an Arduino board into the USB (Universal Serial Bus) cable.
2. Open the Arduino program on the desktop.
3. Complete the following steps to load code into the Arduino.
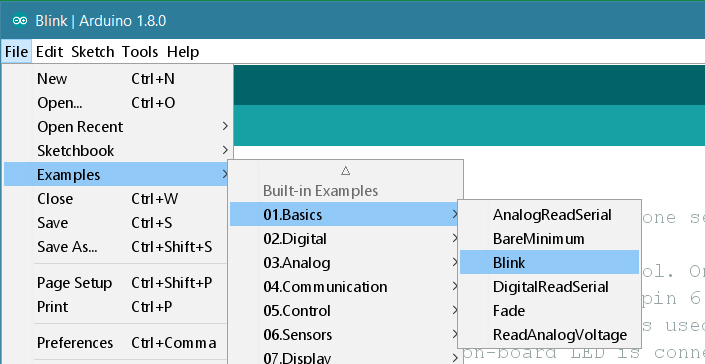
4. Open the LED Blink example sketch: File > Examples >01.Basics > Blink. Blinking an LED on and off is the first step toward programming your Light Sculpture.
5. Select the board type in the Tools > Board menu that corresponds to your Arduino or Genuino board (Arduino/Genuino Uno) (note: this is usually set for you by default).

6.1. Select the serial port of the board that says "(Arduino/Genuino Uno)" from the Tools | Serial Port menu.
6.2. When choosing a Serial Port, you will never pick COM 3 at the DPEA, as this is the mouse and you don't want to send Arduino code to the mouse.
6.3. If you don't see a port that says "(Arduino/Genuino Uno)", check your Arduino's USB connection and try reconnecting the Arduino.
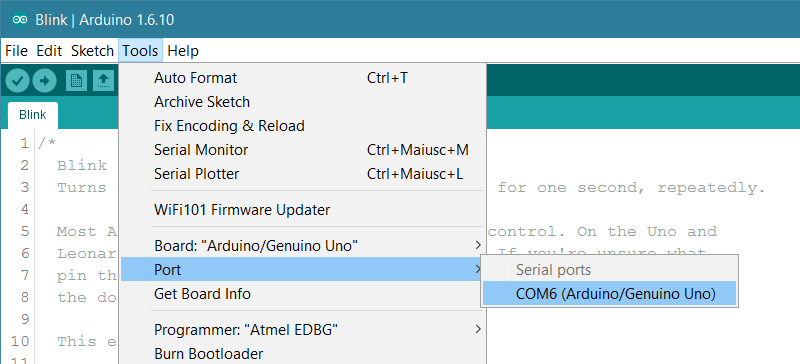
6.4. Forgetting to set the correct serial port is the #1 problem students have in uploading code. Check the Serial Port if you ever see this error message:
![]()
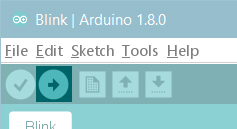
7. Click the "Upload" button in the Arduino programming environment (software program). Wait a few seconds - you should see the blue LED on pin 13 briefly flash 3 times. If the upload is successful, the message "Done uploading." will appear in the status bar.
8. A few seconds after the upload finishes, you should see the pin 13 LED on the LED shield start to blink (in blue). If you look at the Arduino, a small orange LED is also blinking (also connected to pin 13). If it does, congratulations! You've gotten Arduino up-and-running. If you have problems, please see the troubleshooting suggestions.
This guide was adapted by Mr. Stewart from this Arduino tutorial.
Check Your Understanding
1. This process of turning on and off an LED is called a(n) .
2. The process of loading code into an Arduino is called a(n) .